Level 4
| Name | Link | Status | Mentions |
|---|---|---|---|
| Level 4 | https://github.com/aruncs31s/git_by_doing_level_4 | Done |
Task: To understand git branch
Your task is to complete the tasks "One-by-One" , like first execute 'task_1.py' then 'task_2.py' upto 'task_5.py' then attempt the quiz
| Task | command | Use |
|---|---|---|
task_1.py |
git branch |
to create new branch |
task_2.py and task_3.py |
git checkout |
to goto other branches/commits |
task_4.py |
git log and git checkout |
list commits and goto specific branch/commit |
task_5.py |
git branch -d |
-d to delete a branch |
Git branch
According to this site "Some people refer to Git's branching model as its killer feature that includes me also. So there must be something to the banching feature right?.
Yes, infact there are tools other than git for managing you versions and codebase but people prefere git because of this feature.
When do you use git branch
There are times when you want to use the branch feature of git
- When you diverge from the main workflow and create you own changes , without effecting the main.
Looks Complicated? lemme explain.
Imagine your company working on a robotics project , and you are currently usingArduinomicro-controller, its going fine , and youmainbranch contains all the code needed for theArduinoto function. But you have some other idea that you want to use the new famous, low power "ESP8266", What you do?. You can do the following
- Change the code to support "ESP8266" and keep the code your self.
- or "create a new branch" and share code with others
Wait what is the benefit of creating a new branch again?
You are in this case "diverging" (taking another route) from the main branch and creating your own "route". In this way you wont effect other routes (main) more technical explenation below.
- When you want to create and test a new
featurewithout effecting main.
Scientific.
before talking about git branching , we need to understand how the git stores our data, you have already seen the git commit and git log featue , to implement that feature , git must store data somewhere right?
First things to note is that , as i have explained in previous levels , git stores data as a series of snapshots. "When you make a commit, Git stores a commit object that contains a pointer to the snapshot of the content you staged", in simple terms when you do git checkout checkpoint checkpoint points to some snapshot.
Seems complicated?
Imagine snapshots as some serires of photos taken by your camera.If the memory card is empty , "Your first photo" will not have any previous photo right? , which is the first commit. And as you take photos the camera names them as "IMAGE_1.png" "IMAGE_2.png" etc right? So note a few things
- like here the Photo's name is the checkopint and its name is the id and that id points to the photo.
Almost all the snapshots have 1 parent and child,(except initial commit). if you check the folowing
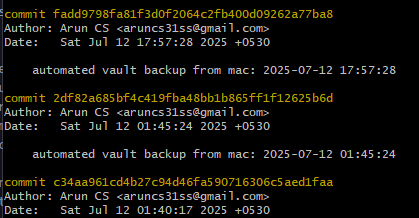
There are 3 commits or snapshots named
-
fadd9798fa81f3d0f2064c2fb400d09262a77ba8
-
2df82a685bf4c419fba48bb1b865ff1f12625b6d
-
c34aa961cd4b27c94d46fa590716306c5aed1faa
for making it simple we will use only first 5 or six characters from the snapshot name
-
fadd97
-
2df82a
-
2df82a
Which is same as above as long as they are unique from each other
infact you can just do this
git checkout fadd
which is same as
git checkout fadd9798fa81f3d0f2064c2fb400d09262a77ba8
and this
git checkout fadd97
If you have commits say abcdef1 and abcdef2
git checkout abcdef
Will not work, because the names are not unique , so you have to use it like this
git checkout abcdef1
You may have already know when clone or create a git repocitory , you will be using main or master branch. For example
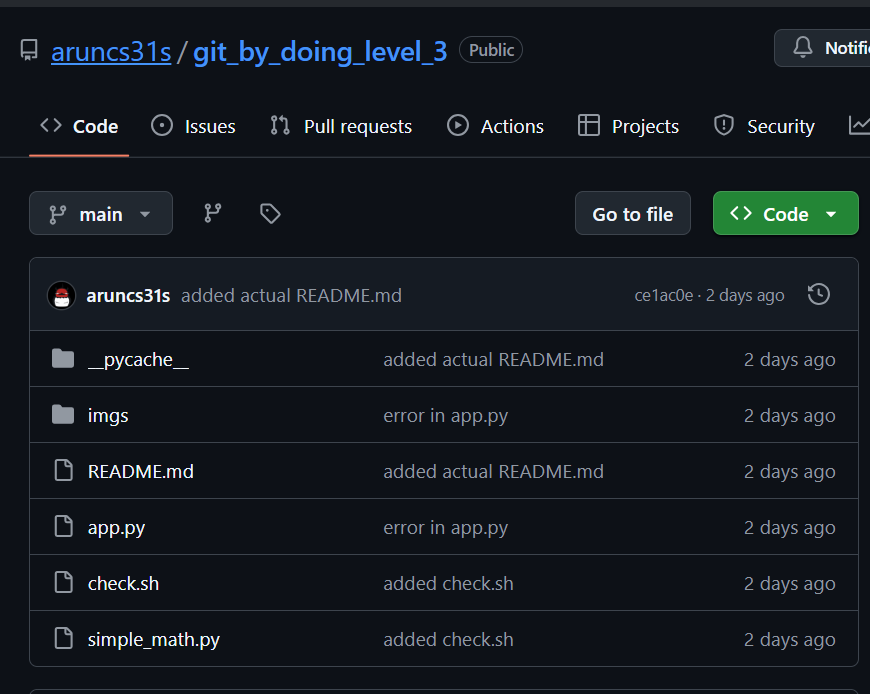
You can see that , there is a text "main" is placed below the "<> Code" which indicates that you are in the "main" branch
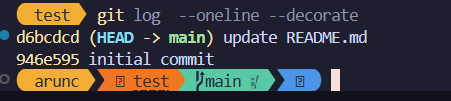
- You check which branch you are on from terminal using the following

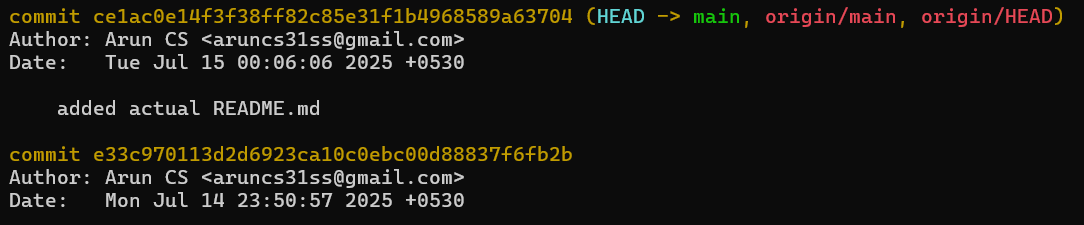
In this following image you can seee that there is "HEAD -> main" , which indicates that the "HEAD" is now pointing to "main"? You lost me? lemme explain
Note these points
- HEAD always points to your current checked out commit. or it's a special pointer that refers to the current commit you have checked out.
- When you do something like
git checkout some_commityou are movingHEADto that commit .

If you look at this this is after i run
git checkout ce1ac0e
You can see it says HEAD is detached at ce1ac0e
The main always contains the same contents of last commit, and checking out the ce1ac0e is same , as the main.
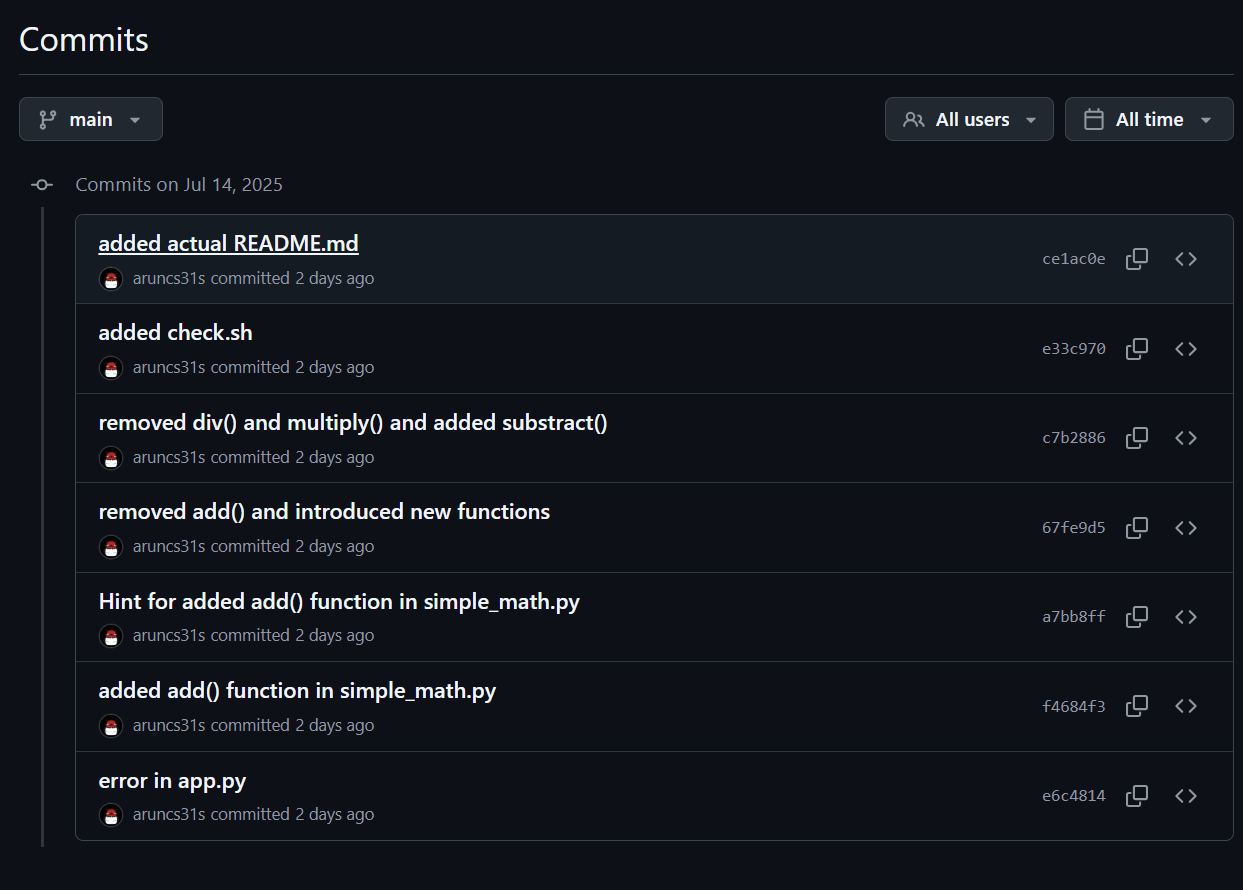
Lets consider this following example , the figure shows the commits of the previous level.
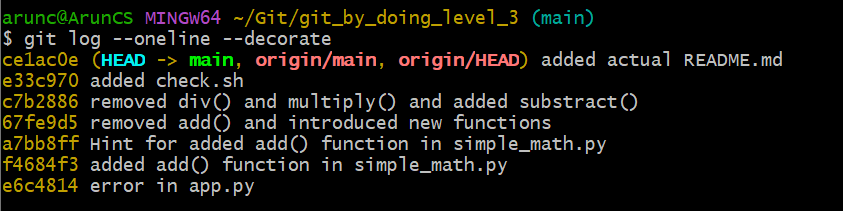
You can see that the HEAD is pointing to main(HEAD -> main), with this wee can conclude that
- a branch is always points to the latest commit .
- and imagin
branchas a named commit.TipTechnically , you can not name you commit, when you do one , the
gitcalculatessha1sumof each files and metadata , and branch is just a pointer to the latest commit.
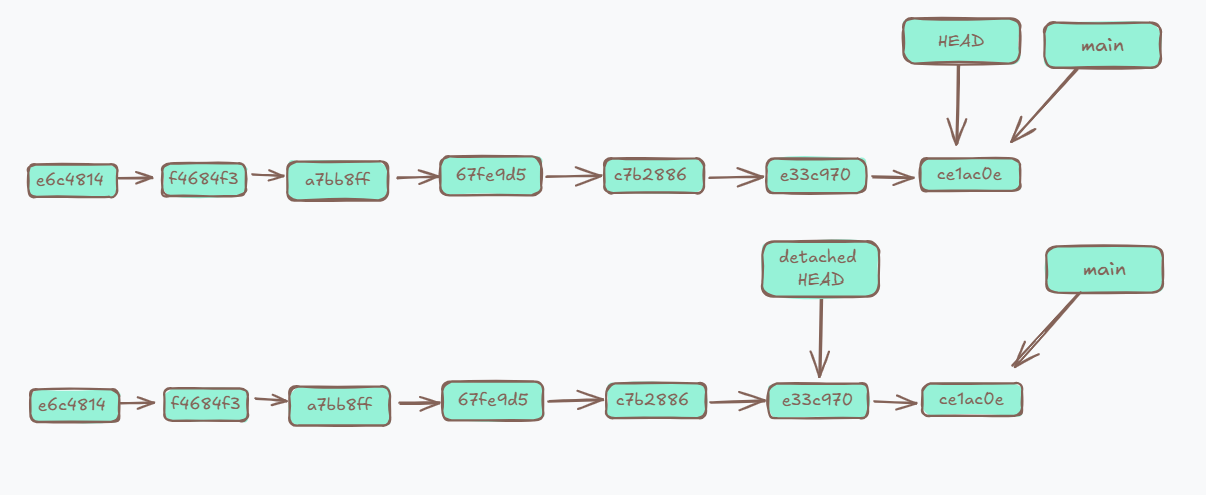
When you do git checkout to some branch you are in the detached HEAD state.
What happen when i create a new branch
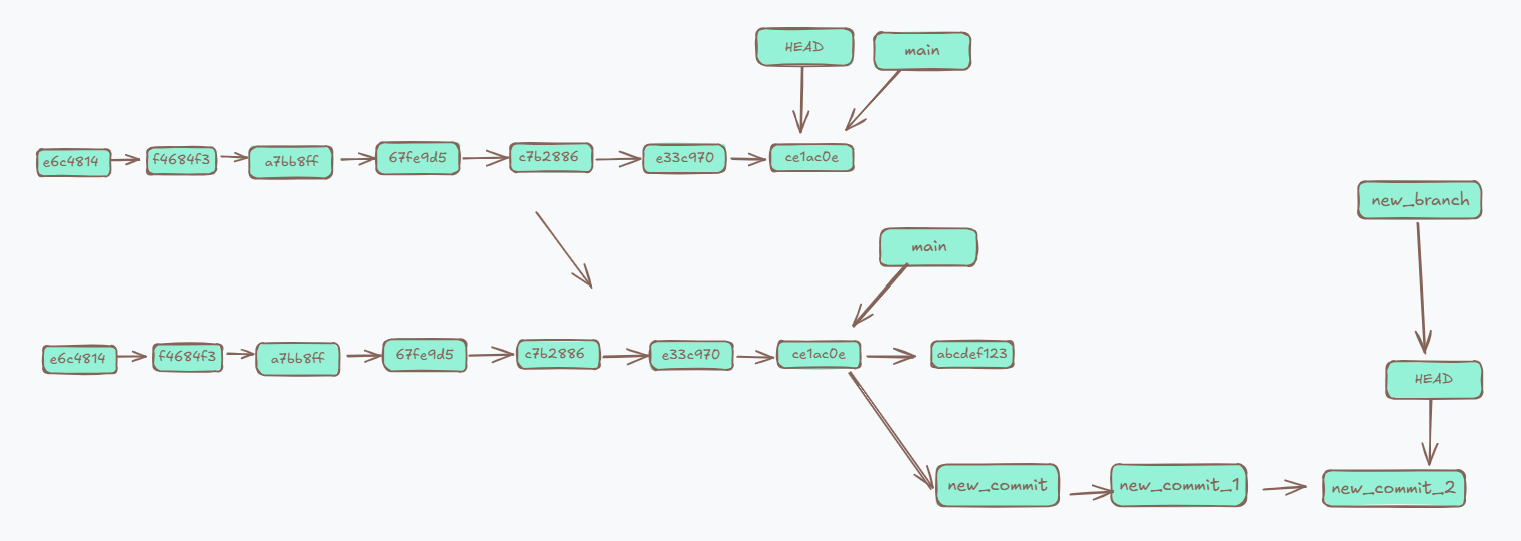
- When you are creating a new branch your new branch will poin to the current commit (the one HEAD is currently pointing to).
- and when you are checking out a branch the
HEADmoves to the latest commit of that branch
This is the log from main branch You can see that the HEAD is now pointing to main
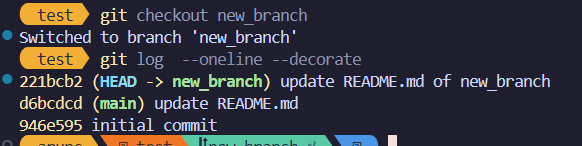
This after checking out new_branch , you can see that it says HEAD -> new_branch
What ever you do on one branch would not effect the other branches.
You can create a new branch using
git branch branch_name
or you can do
git switch -c branch-name
this combines both creating a new branch and checking the branch.
And if you have done with a branch you can delete it using the following
git branch -d branch-name
or you can force your deletion
git branch -D branch-name
Solutions
git branch ESP8266
git checkout ESP8266
- now edit the code
#include <Arduino.h>
#define LED_BUILTIN 13
void setup() { pinMode(LED_BUILTIN, OUTPUT); }
void loop() {
  digitalWrite(LED_BUILTIN, HIGH);
  delay(1000);
  digitalWrite(LED_BUILTIN, LOW);
  delay(1000);
}
#include <Arduino.h>
#define LED_BUILTIN D4
void setup() { pinMode(LED_BUILTIN, OUTPUT); }
void loop() {
  digitalWrite(LED_BUILTIN, HIGH);
  delay(1000);
  digitalWrite(LED_BUILTIN, LOW);
  delay(1000);
}
python task_2.py
Please change the code.cpp to run on ESP8266 Boards.
python task_2.py
You have successfully completed this level.
You can now proceed to the next task.
python task_3.py
- it will tell you to checkout main and modify the
code.cpp, but since you are already changedcode.cpp
git checkout main
python task_3.py
python task_4.py
git checkout 1215bf0f
- this was expected to work but since you are not commit the modified code you have to stash it
git stash
python task_4.py
git branch Arduino
git branch -d ESP8266